Have you ever lent something to a friend or family member and never seen it again? Not with this app!
BorrowBuddy tracks which of your items you lent out and to whom you lent the item. You simply select the "Create New Loan" button on the home screen to select a borrower and an item from your list or create a new one by completing the provided form fields. You then enter the number of days the item has been borrowed, the number of reminders you have sent the borrower about your loan, and whether or not the item has been returned.
If you send a reminder or the item is returned, just select the "Edit" link next to the loan, make the appropriate changes, and click the "Update Loan" button.
- Prerequisite technologies needed with download instructions for each technology
- Installation
- App usage instructions
- Technologies used to build this app
- Contributing information
- Author information
- Acknowledgments
- License information
BorrowBuddy uses Ruby version 2.5.3. In my opinion, the best way to install Ruby is by using a Ruby version management system. The two most popular tools for this are RVM and rbenv. I've used both and have found rbenv to be more well-documented and easier to navigate than RVM but the ultimate choice is yours.
Since I use rbenv, I'm going to walk you through that installation. (NOTE: If you decide to install rbenv and you used to use RVM, you must remove all RVM files or rbenv will not work!)
For Mac Users
If you haven't done so already, download **[Homebrew]**. It's an amazing macOS package manager that's built with Ruby. Just paste the following script in a new terminal window:/usr/bin/ruby -e "$(curl -fsSL https://raw.githubusercontent.com/Homebrew/install/master/install)"It will run through the installation, and explain the steps the script is taking along the way.
Once Homebrew is installed (or if you already had it installed, you smarty pants!), it's time to install rbenv. Open a new terminal window running bash or zsh and cd into your home path (i.e. Users/yourname/). Now type brew install rbenv *Note: This command also installs ruby-build, so you'll be ready to install other Ruby versions out of the box. Once rbenv is done installing, type rbenv init to begin the shell integration setup.
Restart your terminal for the installation changes to take effect. Make sure your setup is correct by running the rbenv-doctor script below:
curl -fsSL https://github.com/rbenv/rbenv-installer/raw/master/bin/rbenv-doctor | bashNOW we install RUBY!
In your terminal, type rbenv install 2.5.3 to download the version of Ruby you'll need to run Code Talks.
Once it's done installing, navigate to the Code Talks directory and type rbenv local 2.5.3 to set your local environment's Ruby version. Then type rbenv rehash.
For Windows and Linux Users
To install rbenv on your system, open up a new window in your terminal and run [the `rbenv-installer` script][rbenv script] below:curl -fsSL https://github.com/rbenv/rbenv-installer/raw/master/bin/rbenv-installer | bashIt will either install rbenv on your system or update your pre-existing version of rbenv, located under ~/.rbenv. Additionally, ruby-build is also installed if rbenv install is not already available.
Restart your terminal for the installation changes to take effect. Make sure your setup is correct by running the rbenv-doctor script below:
curl -fsSL https://github.com/rbenv/rbenv-installer/raw/master/bin/rbenv-doctor | bashNOW we install RUBY!
In your terminal, type rbenv install 2.5.3 to download the version of Ruby you'll need to run BorrowBuddy.
Once it's done installing, navigate to the BorrowBuddy directory and type rbenv local 2.5.3 to set your local environment's Ruby version. Then type rbenv rehash.
BorrowBuddy uses Bundler to manage the Ruby Gems packaged in the app. Installing Bundler is as simple as opening a new terminal window and typing gem install bundler and you're ready to go!
The database for BorrowBuddy is PostgreSQL version 11.5. Visit PostgreSQL's official site and select your operating system in order to download the right package. There's one option available for Windows users. As a Mac user, I originally used Homebrew as my download option, but after trying Postgres.app, I found it to be much more simple and user-friendly. There are plenty of options for whichever server type you prefer!
Fork this repository from GitHub and clone your forked copy down to your computer. Open a new terminal window and cd into the borrow-buddy root directory. Create a new file by typing touch .env and input the following text into this file:
POSTGRES_USER=YOUR_USERNAME
POSTGRES_PASSWORD=YOUR_PASSWORD
POSTGRES_HOST='localhost'
POSTGRES_DB='borrow-buddy'
POSTGRES_TEST_DB='borrow-buddy_test'
Replace YOUR_USERNAME with your computer's username—the name used in your terminal's root path ($PATH), or what you see when you type PWD in your terminal (i.e. Users/yourname/)—in single quotes and YOUR_PASSWORD with whatever you want it to be, again in single quotes.
Type bundle install into the terminal to load all of the Ruby Gems and dependencies into your app. Start up the PostgreSQL server and type rails db:setup into the terminal. This allows PostgreSQL to create two new databases (development and test) using the .env file you just created in the BorrowBuddy app (in addition to pre-existing configurations). Next, type rails db:migrate. This step runs the table migrations in the app, which gives the database instructions on what kind of data it should look to receive and to which models and attributes the data corresponds.
To start up the Rails server, which is in charge of rendering your app on the web, therefore allowing users to interact with it, type rails s in the terminal. You should now be able to open up a new browser window and navigate to http://localhost:3000/ and see the BorrowBuddy homepage displayed. From there, either log in or sign up and have fun!
When you're done, just type Ctrl + C in the terminal to stop your Rails session and remember to also shut down your PostgreSQL server. If you'd like to reset the database to delete any objects you've created and start over fresh, type rails db:reset into the terminal.
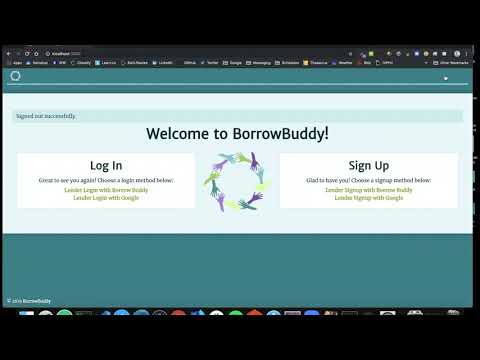
I recorded a quick demo video (below) on how to use BorrowBuddy.
I also created a seed file which holds randomized data to use specifically for app development and testing purposes. If you'd like to explore BorrowBuddy with data preloaded into the database, type rails db:seed in the terminal and log in using one of the following credentials:
Email: [email protected]
Password: password

Email: [email protected]
Password: password
Both accounts have multiple loans, borrowers, and items already tracked upon login and you can manipulate the app from there, editing, creating, and deleting to your heart's content.
- Ruby - The programming language used
- Rails and [ActiveRecord] - The Ruby frameworks used
- PostgreSQL - The relational database used
- Devise - The user authentication system
- Bootstrap 4 and GoogleFonts - The styling tools used
- And don't forget good old HTML5 and CSS3! <3
Issues and pull requests are welcome at this repository. This project as well as all other content on my GitHub are intended to be safe, welcoming, and open for collaboration. Users are expected to adhere to the Contributor Covenant code of conduct and those that do not will be reported and blocked. I got no time for that nonsense.
Connect with me on... GitHub, LinkedIn, Twitter, and DEV!
- Flatiron School for making my ass do this project in the first place
- My wonderful neighbors Mark and Alexis, especially Mark who suggested the idea based on my original project design and thankfully doesn't give trombone lessons to middle schoolers anymore
- Dwayne Harmon who coached me through the learning process with a collaborative attitude, an inquiring mind, and a smile on his face
This project is licensed under the MIT License - see the LICENSE.md file for details