What you need
Roblox studio:https://www.roblox.com/create
The startgrid mesh obj for blender which is provided
Track studio: https://github.com/MapStudioProject/Track-Studio
Startgrid mesh: https://www.roblox.com/library/9691955785/StartGrid
Plane mesh: https://www.roblox.com/library/9691922213/flat-plane
Blender: https://www.blender.org/
Builder v4: https://www.roblox.com/library/143383965/Build-v4
Open up roblox studio and start with a baseplate, a stud baseplate and then go to the explorer and click on workspace, a small "+" icon should show up
click on that and then add a folder and name it to something like road or track

Now click over folder you just added and press the + icon again, search for mesh part and add it in or drag and drop into the folder you just created, and then press on your mesh part and open the links to Startgrid and Plane meshes
It should now look like this don't forget to click on your meshpart, you are ready to add your meshes!

Go to the links to startgrid and plane meshes and click on the url, highlight the numbers and copy
Then go back to roblox studio, click a mesh part and go down to properties and paste in the Mesh id, it should look like this now

Do the same for the plane mesh and you should be good to go!
Now, you will need the builder v4 plugin and you have to scale your plane mesh otherwise the track would look too small
you might need to move the startgrid just a tad so that you can see what you're doing

Open the builder v4 plugin and hover your mouse over the edge of the mesh, it should look like this
oh yeah don't forget to click on the button that has two green arrows, this will be used for scaling and making curves


If you have gotten this far then great! the track might look like this when you are done creating the layout when clicking on the folder

You can delete your mesh part that has the startgrid mesh applied to it, we don't need that right now since we'll be using the stargrid.obj in blender for actual in-game size
Now it's time for exporting! Right click on the folder and move to export section the folder and the whole model will export as an .obj
Save it to a directory that you know where to find and then open blender and you will notice a cube, camera and light Hold left click and move your mouse over those and then press X to delete them because those will get in the way, especially the cube
Now go to the top left and click file>import>Wavefront (.obj) and then find your exported .obj model from roblox studio
it should now look like this!

If there is a camera fog or camera clipping press N and then go to view, click on end and put any high number like 99999999
Now you need to import the startgrid.obj to compare size and it now should look like this

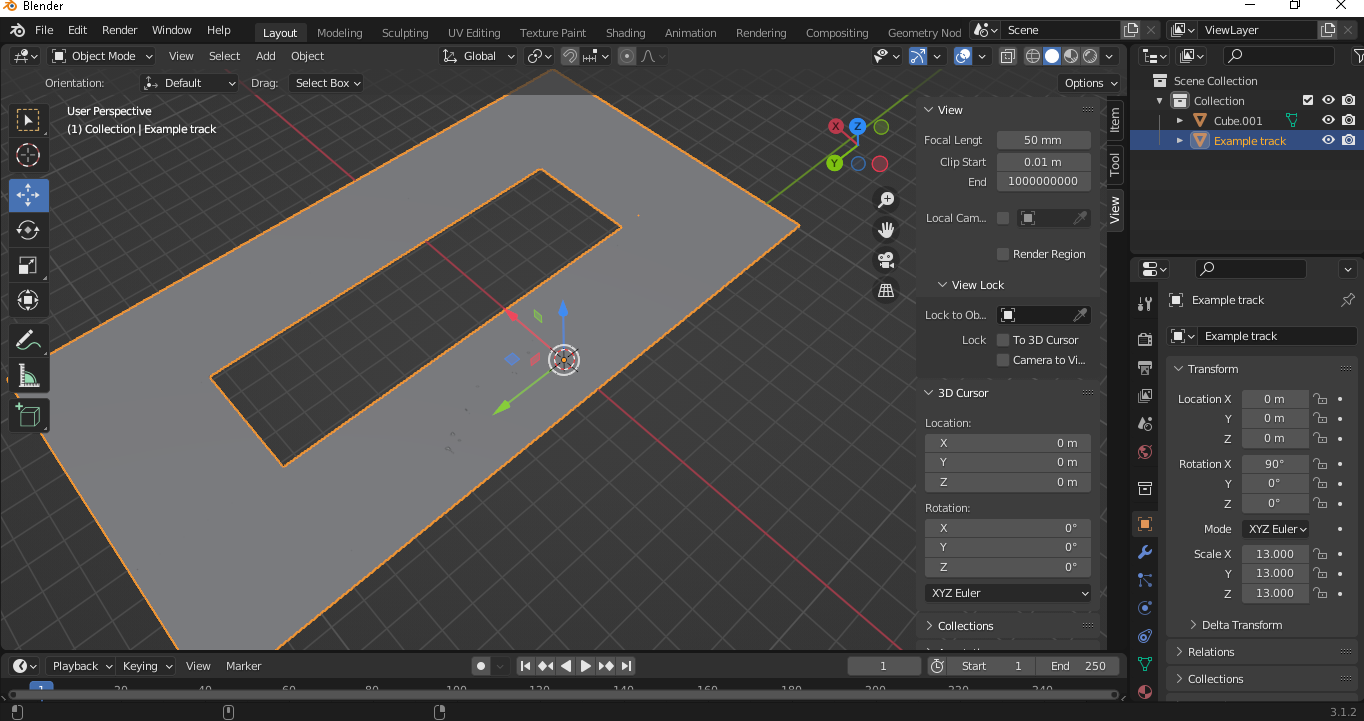
Click on the model you imported before and there should be stuff like position, rotation and scale size
set the scale size to numbers between 12-15, now you got this!
Before we export from blender, you can delete the startgrid model since we don't need that anymore in blender now press A and then press Ctrl + A and then press All transform, this will select everything and transform the model scale size back to 1 but it will keep the actual model size that you changed (you have to transform all otherwise the game will render the model WAY too big!)
Now go to file>Export>Collada (.dae) BEFORE YOU EXPORT! you need to set the position model to the following:

If you press on any other position setting the game will render the model on it's side or upside down, set the exact setting in the image!
Now you can export as .dae
Now open track studio and go to file>new>custom track you should get a window like this one

If you are using the wiiu version:

If you are using the switch version:

Click ok if you toggled that setting depending which console you're using now you are in the main program
go to collision editor and on the left size theres a course_kcl.szs left click and then move down a bit and hit replace and replace it with your track model .dae file
another window is going to open and it will have a few options on what type of collision it's going to set, you need to click on Materials by Meshes, since this is just a example track click on road1 and just set it to something like asphalt now it should look like this

Move over to model editor and do the same from collision editor, but this time move to the model directory and do the same and now it should be like this on both model and map editor


You might need to reposition the startgrid point as so here:

Now click on file>save for map, model and collision, find your files in the directory you saved them in and copy them to your modpack or an emulator modpack/graphics pack i am going to import this track to Gu_FirstCircuit (Mario kart Stadium)
Now for the result... https://youtu.be/f3T-FSgr3VU
Taadah!! Now you know how to make custom tracks, i hope this helps :D