Configuration
Ox uses Lua as a configuration language.
You can find an example configuration file (which is probably the easiest way to learn how to configure).
As standard, your configuration file is located in ~/.oxrc.
Ox will not install this for you as standard, and instead will use built-in defaults.
You will need to create this ~/.oxrc file yourself. I recommend pulling the default configuration file found in the config folder in the main repository and copying it to ~/.oxrc.
You can use the following commands to do this:
cd ~
curl -O https://github.com/curlpipe/ox/raw/master/config/.oxrc
Then, feel free to play around with this configuration file.
See the Configuration section below to see more details on how the configuration file is structured
You can change many aspects of Ox:
- Mouse behaviour
- Colours of the editor
- Colours of the syntax highlighter
- Line numbers
- Status line contents and padding / alignment
- Contents and visibility of the greeting message
This is enabled by default.
This feature will enable you to click on parts of the document and select / copy / paste text natively.
Note that you can change the selection colour as in the following example:
colors.selection_bg = "black"
colors.selection_fg = "white"
You can disable it by including the following line:
terminal.mouse_enabled = false
This is a very important part to understand
Colours in the ox configuration file can be of the following form:
{RED, GREEN, BLUE} for rgb colours
"HEX CODE" for hex codes (be sure to include the #)
"COLOUR NAME" for various colour names e.g. red, green, darkblue, magenta etc
Be sure to check out the Format of Colours section above to learn how to structure colours
In the configuration file, the colors table is in charge of storing the colours the editor should be.
You can change the colours of the editor by setting the following variables:
Note foreground is equivalent to text colour and background is the background colour of the text.
Editor
background found in colors.editor_bg
it can be set (for example) like colors.editor_bg = "black"

foreground found in colors.editor_fg
it can be set (for example) like colors.editor_fg = "black"

Line Numbers
background found in colors.line_number_bg
it can be set (for example) like colors.line_number_bg = "black"
foreground found in colors.line_number_fg
it can be set (for example) like colors.line_number_fg = "black"

Status Line
background found in colors.status_bg
it can be set (for example) like colors.status_bg = "black"
foreground found in colors.status_fg
it can be set (for example) like colors.status_fg = "black"
Highlight
found in colors.highlight
it can be set (for example) like colors.highlight = "black"
Active Tabs
found in colors.active_tab_bg and colors.active_tab_fg
it can be set (for example) like colors.active_tab_fg = "black"

Inactive Tabs
found in colors.inactive_tab_bg and colors.inactive_tab_fg
it can be set (for example) like colors.inactive_tab_bg = "black"

Info Message
background found in colors.info_bg
it can be set (for example) like colors.info_bg = "black"
foreground found in colors.info_fg
it can be set (for example) like colors.info_fg = "black"
Warning Message
background found in colors.warning_bg
it can be set (for example) like colors.warning_bg = "black"
foreground found in colors.warning_fg
it can be set (for example) like colors.warning_fg = "black"

Error Message Background
background found in colors.error_bg
it can be set (for example) like colors.error_bg = "black"
foreground found in colors.error_fg
it can be set (for example) like colors.error_fg = "black"

You can configure how many spaces tabs will be rendered as by setting the following:
document.tab_width = 4You can configure after how long the editor will save your current actions and commit them to the event stack so that you can go back to the document state at that time. Let's say you want the document to group your previous actions and save them after 10 seconds of inactivity, you could do that like so:
document.undo_period = 10You can configure the cursor behaviour. Cursor wrapping is where you hit the start or end of a line, and it moves to the previous or next line automatically if you try and move left / right out of bounds. It is enabled by default, but you can disable it as such:
document.wrap_cursor = falseYou can enable or disable line numbers by setting line_numbers.enabled
E.g. line_numbers.enabled = false disables line numbers, line_numbers.enabled = true enables line numbers
You can also adjust the padding to the left and right of the line numbers if you're a fan of extra (or less) space:
-- Here are the defaults that ox uses (measured in space characters " ")
line_numbers.padding_left = 1
line_numbers.padding_right = 1A status line is made up of "parts" these are groups of information.
For example, if you want some of the status line on the left (e.g. file name, file type) and some of the status line on the right (e.g. cursor position), then you must create two parts.
To create parts, you can use the status:add_part method to add a part to the status line.
E.g. status:add_part("PART FORMAT STRING")
An example part format string is as follows: This is my file: {file_name}
If you look at the file text.txt This will show This is my file: test.txt
Anything between { and } is used to bring data from the editor and interpolate it into the status line.
The following options are available:
-
{file_name}- The name of the file that is currently open -
{modified}- Will show[+]if the current file differs from the file on the disk and will show nothing if not -
{file_type}- This shows the type of file i.e.Rustfor files with thersextension -
{cursor_y}- The line the cursor is on -
{cursor_x}- The character the cursor is on (horizontally) -
{line_count}- The number of lines in the document currently open
Anything outside of these {} will be put in as is, which allows you to put separators or static text
After adding your parts to the status line, the next thing you can set is the alignment / padding
There are two modes to pad / align status parts:
-
around- this will place padding to the left, right and between parts -
between- this will place padding only between parts
You're probably going to want to use between, unless you want a more unique look to your status line.
The best way to understand what these look like is to experiment with them.
To set the alignment mode, you can set the status_line.alignment variable as such:
status_line.alignment = "around"
-- OR --
status_line.alignment = "between"You can enable the tab line using tab_line.enabled
You can also adjust how each tab is formatted, similar to the status line above
The values available to place in tab format are as follows:
-
{file_name}- The name of the file the tab represents -
{modified}- Will show[+]if the file the tab represents differs from the file on the disk and will show nothing if not
Using these values, you can set the format of how tabs appear using tab_line.format
Below is an example configuration entry to have the tab line showing with each tab having just the file name and some spacing on each side:
tab_line.enabled = true
tab_line.format = " {file_name} "You can enable / disable the greeting message by setting greeting_message.enabled:
-- For enabling the greeting message: --
greeting_message.enabled = true

-- For disabling the greeting message: --
greeting_message.enabled = false
You can also set the actual contents of the greeting message as such:
greeting_message.format = [[
Ox editor version {version}
]]
Here, if you are running version 0.3.3 of the editor, then the greeting message will show Ox editor version 0.3.3
As with status lines, anything between { and } will be replaced with information from the editor.
The following options are available:
-
{version}- the version of the editor that is running -
{highlight_start}- starts the highlight colour from being used as text colour -
{highlight_end}- stops the highlight colour from being used as text colour
NOTE: when using {highlight_start} or {highlight_end}, it is best practice to put these on their own line as not doing so can mess with the alignment of the greeting message.
If there is a feature you would like to integrate into Ox that doesn't currently come as standard, then the plug-in API may allow you to implement this feature.
As with the rest of the configuration, the language used is Lua and plug-ins are defined in the same configuration file (~/.oxrc)
You can also use other people's plug-ins. See the plugins folder in the repository to see some pre-made plugins, including auto bracket pairs and automatic indentation. To enable these plug-ins, please see the Plugin Distribution section below.
You are very likely going to want to interact with the editor somehow, whether it's displaying a message to the user, or writing some text for them. The way to interact with the editor is through the API. There are a wide range of methods available for you to call, attached to an editor table.
Here are all the commands that you can run that may come in handy:
| Command | Description | Example usage |
|---|---|---|
editor:display_error |
This command will display an error message to the user (red by default) |
editor:display_error("file not found") which will display an error message saying "file not found" |
editor:display_warning |
This command will display a warning message to the user (yellow by default) |
editor:display_warning("backup failed") which will show a warning message saying "backup failed" |
editor:display_info |
This command will display an information message to the user (blue by default) |
editor:display_info("time to take a break") which will show info to the user asking them to take a break |
editor:prompt |
This command will ask the user for something and return what they entered |
name = editor:prompt("What's your name") which will ask the user their name and store their answer in the name variable |
editor:insert |
This command will insert specified text at the place where the cursor currently is in the document |
editor:insert("3.141") which will insert PI (the number) where the user's cursor currently is |
editor:remove |
This command will essentially just simulate the user pressing the backspace key, and will delete whatever is behind the cursor |
editor:remove() which will simulate the user pressing backspace |
editor:insert_line |
This command will insert a line at the current position of the cursor, it essentially simulates the user pressing the enter key |
editor:insert_line() which will simulate the user pressing enter |
editor:remove_line |
This command will delete the line that the cursor is currently on |
editor:remove_line() which will remove the line where the cursor is, e.g. line 3 if the cursor is on line 3 |
editor:move_to |
This command will move the cursor to a specified x and y coordinate in the document |
editor:move_to(3, 1) which will move the cursor to the third character (x coordinate) on the first line (y coordinate) |
editor:move_up |
This command will move the cursor one upwards |
editor:move_up() which will move the cursor to the line above where it currently is |
editor:move_down |
This command will move the cursor one downwards |
editor:move_down() which will move the cursor to the line below where it currently is |
editor:move_left |
This command will move the cursor one to the left |
editor:move_left() which will move the cursor to the left |
editor:move_right |
This command will move the cursor one to the right |
editor:move_right() which will move the cursor to the right |
editor:move_home |
This command will move the cursor to the beginning of the current line |
editor:move_home() which will move the cursor to the beginning of the line it is currently on |
editor:move_end |
This command will move the cursor to the end of the current line |
editor:move_end() which will move the cursor to the very end of the line it is currently on |
editor:move_page_up |
This command will scroll up a page e.g. if the viewport is 20 lines in height, then it will scroll 20 lines upwards |
editor:move_page_up() which will move up one page |
editor:move_page_down |
This command will scroll down a page e.g. if the viewport is 20 lines in height, then it will scroll 20 lines downwards |
editor:move_page_down() which will move down one page |
editor:move_top |
This command will move the cursor to the first line in the document |
editor:move_top() which will move to the top of the document |
editor:move_bottom |
This command will move the cursor to the last line in the document |
editor:move_bottom() which will move to the bottom of the document |
editor:move_previous_word |
This command will move the cursor to the previous word (separated by spaces) |
editor:move_previous_word() which will move the cursor to the previous word |
editor:move_next_word |
This command will move the cursor to the next word (separated by spaces) |
editor:move_next_word() which will move the cursor to the next word |
editor:insert_at |
This command will insert text at a certain x and y location |
editor:insert_at("Hello", 2, 3) which will insert the text "hello" at the 2nd character of the 3rd line |
editor:remove_at |
This command will remove the a character at a certain x and y location |
editor:remove_at(4, 1) which will remove the 4th character on the 1st line |
editor:insert_line_at |
This command will insert a line at a certain line number |
editor:insert_line_at("new line", 4) which will create a new line on line 4 of the document with the text "new line" |
editor:remove_line_at |
This command will remove the line at a certain index |
editor:remove_line_at(4) which will remove the 4th line in the document |
editor:open_command_line |
This command will open the command line |
editor:open_command_line() which will open the command line |
editor:previous_tab |
This command will move to the previous document that is currently opened in the editor |
editor:previous_tab() which will move focus to the previous document that is currently opened |
editor:next_tab |
This command will move to the next document that is currently opened in the editor |
editor:next_tab() which will move focus to the next document that is currently opened |
editor:new |
This command will create and open a new document for the user to write in |
editor:new() which will create a new document |
editor:open |
This command will ask the user for a file name and then open that file |
editor:open() which will ask the user for a file to open, and then open it |
editor:save |
This command will save the document the user is currently on |
editor:save() which will save the current document |
editor:save_as |
This command will ask the user for a file name and save the current document to that path |
editor:save_as() which will ask the user for a path to save the current document to |
editor:save_all |
This command will save all currently opened documents |
editor:() which will save all opened documents |
editor:quit |
This command will quit the current document (and the whole editor if all documents are quit out of) |
editor:quit() which will close the current document (and the whole editor if all documents have been closed) |
editor:undo |
This command will trigger an undo action |
editor:undo() which will undo the last change the user made |
editor:redo |
This command will trigger a redo action |
editor:redo() which will redo the last change the user made |
editor:search |
This command will trigger the search wizard |
editor:search() which will ask the user for what they wish to search for and move the cursor along all matches |
editor:replace |
This command will open the replace wizard |
editor:replace() which will ask the user what they want to replace and what to replace with, and then provide options to replace certain instances or all instances |
editor:get_character |
This command will get the character that the cursor is currently over |
editor:get_character() which will return e, for example, if the cursor in the editor is next to the letter e in the document |
editor:get_character_at |
This command will get a character at a certain location within the document |
editor:get_character_at(3, 1) which will get the 3rd character on the first line |
editor:get_line |
This command will get the line the cursor is currently on in the document |
editor:get_line() which will get line 2, for example, if the cursor in the document is currently at line 2 |
editor:get_line_at |
This command will get the line at a certain index |
editor:get_line_at(5) which will get the fifth line in the document |
editor:move_to_document |
This command will move to a document that is currently open |
editor:move_to_document(0) which will move to the first document that is open in the editor |
editor:move_previous_match |
This command will move to a previous instance of a certain string |
editor:move_previous_match("self") which will search backwards until it finds the text self, and then move the cursor to where that text is in the document |
editor:move_next_match |
This command will move to the next instance of a certain string |
editor:move_next_match("bar") which will search forwards until it finds the text bar, and then move the cursor to where that text is in the document |
editor:hide_help_message |
This command will hide the in-editor help message |
editor:hide_help_message() which will hide the help message |
editor:show_help_message |
This command will show the in-editor help message |
editor:show_help_message() which will show the help message |
editor:set_read_only |
This command will set the file's read only status |
editor:set_read_only(true) which will make the file that is currently open read only |
editor:set_file_type |
This command will set the file type of the file that is currently open |
editor:set_file_type("py") which will set the file type of the file currently open to a python file, and enable language-specific features such as syntax highlighting |
editor:select_up |
This command will move the cursor up whilst selecting |
editor:select_up() which will move the cursor up whilst selecting |
editor:select_down |
This command will move the cursor down whilst selecting |
editor:select_down() which will move the cursor down whilst selecting |
editor:select_left |
This command will move the cursor left whilst selecting |
editor:select_left() which will move the cursor left whilst selecting |
editor:select_right |
This command will move the cursor right whilst selecting |
editor:select_right() which will move the cursor right whilst selecting |
editor:select_all |
This command will select all the text in the currently open document |
editor:select_all() which will select all the text in the currently open document |
editor:copy |
This command will copy the currently selected text |
editor:copy() which will copy the currently selected text |
editor.cursor |
This command will return the current cursor position of the document |
editor.cursor.x which will return the x coordinate of the cursor (the character) and editor.cursor.y which will return the y position of the cursor (line number) |
editor.document_name |
This command will return the name of the document |
editor.document_name which will return the name of the document that is currently being looked at |
editor.document_length |
This command will return the number of lines in the document currently open |
editor.document_length which will return 300 if the document currently being looked at is 300 lines in length |
editor.document_type |
This command will return the type of document you're looking at |
editor.document_type which will return "Python", for example, if you are looking at a .py file |
editor.version |
This command will return the version of the editor |
editor.version which will return "0.4.3" if you're using version 0.4.3 of Ox |
editor.current_document_id |
This command will give the ID of the document that the user is currently looking at |
editor.current_document_id which will return 1 for example, if the user is looking at the second document open and 0 if the user is looking at the first one |
editor.document_count |
This command will return the number of documents currently open |
editor.document_count which will return 5 if there are 5 documents currently open in the editor |
editor.help_visible |
This command will return true if the in-editor help message is showing, and false if not |
editor.help_visible which will return false, for example, if the in-editor help message is hidden |
Now you know how to interact and control the editor from your plug-ins, you can get to work writing them.
Please note that you can use all APIs available in the standard library of Lua, e.g. shell commands.
handle = io.popen("date") -- run the "date" command to get the date and time
date = handle:read("*a") -- read the result of the command
handle:close()

-- Now display to the user the date and time
editor:display_info("The date and time is currently: " .. date)Here, we ask the user for their HTML tag name e.g. body or h1 and then insert both the starting and ending tags for them to use
tag_name = editor:prompt("Tag name")
editor:insert("<" .. tag_name .. ">\n\n</" .. tag_name .. ">" )
For example, if the user puts in style, it would write:
<style>

</style>
in their document (at the location of where the cursor currently is)
This would be a quick way to write HTML tags without having to repeat yourself all the time
Now you've been able to understand how to write your plug-ins, we must go over how to start them when in the editor.
There are two main ways to trigger plug-ins:
- On key press
- When a command is run (by default, you can access the command line by using the key combination Ctrl + K and then typing in a command there)
In the configuration file, key presses are represented with strings.
Modifiers, such as ctrl, alt and shift come first, followed by key codes e.g. backspace or z or 4
Here are some examples:
-
a- the a key on the keyboard is pressed -
ctrl_a- the control key is held down, followed by the a key being pressed -
ctrl_alt_s- the control key is held down, then the alt key is held, then the s key is pressed -
esc- the escape key is pressed
When the user presses a key, Ox will send that key press through to your configuration file. It will check in a table called event_mapping for a key combination corresponding to the key the user pressed and then run the function that was attached to that key combination.
It's probably better demonstrated with an example:
event_mapping = {
    ["ctrl_h"] = function()
        editor:display_info("You pressed CTRL and H")
    end,
}
here you can see the binding of ctrl h to a function which will display an info message to the user.
in the default config file (in config/.oxrc in the repository) you can see a list of all the key bindings that are used by default.
You are free to use any key binding for whatever purpose you please.
So, perhaps you don't want to run a plugin on a key press, or you would like your plug-in to act differently depending on what the user inputs. This can be done through custom commands.
Just like with key bindings, you can add custom commands into the configuration file at ~/.oxrc.
When a command is run, it is shown to the configuration file, which can then determine how to deal with that command.
The command table defines how to handle various commands to the user. The keys are the command name, and the values are functions.
Here is an example:
commands = {
    ["greet"] = function(arguments)
        editor:display_info("Hello, " .. arguments[1] .. ", nice to meet you")
    end,
}
When the user writes a command that starts with greet, followed by some arguments (separated by spaces), it will take the first argument the user provided, and display a message to greet the user.
For example, if I were to open the command line using Ctrl + K (which is the default key binding for opening the command line), and run the command greet James then the first argument would be James, and the editor would display Hello, James, nice to meet you. Arguments are a list of what the user has put in (after the initial command name, which is greet in this case)
You could extend on this (to demonstrate multiple arguments) as such:
commands = {
    ["greet"] = function(arguments)
        first_name = arguments[1]
        surname = arguments[2]
        editor:display_info("Nice to meet you, " .. first_name .. " " .. surname)
    end,
}
where we use the first argument as the first name and the second as the surname.
E.g. greet James Smith would display Nice to meet you, James Smith to the console (here using both the first and second argument)
There may come a time where you want to distribute your plug-in or download someone else's plug-in.
You can see a list of plug-ins you might want to use in the plugins folder in the repository. This includes plug-ins such as auto bracket pairs (for quick editing) and auto indentation in code files.
You may also find another plug-in elsewhere, such as on github.
Plug-ins should be in a single lua file (or multiple lua files with a central one that imports the others).
Download all lua files and place them in your ~/.config/ox/ folder (on unix based systems) or in an ox folder in your user's home directory on windows (e.g. C:/Users/Boris/ox/).
Then, in your configuration file, you can import plugins by using the load_plugin function.
Say you want to install the pairs.lua plug-in, which is included in the plugins folder.
- Download it and put it in the
~/.config/ox/folder as~/.config/ox/pairs.lua - Load it in your configuration file (it is best to put it at the bottom of the config file)
Ox will look in the directory for the plug-in
load_plugin("pairs.lua")
pairs.lua, which we downloaded in step 1 - Now when the editor is opened, the plugin should be up and running
If you want to override or set key bindings in your plug-in, you can do it, for example, like this:
event_mapping["ctrl_h"] = function()
    -- Your plugin code goes here
end
This just adds to the same event_mapping object the user has in their config file.
Similarly, to add in a command, you can do the following:
commands["name"] = function(arguments)
    -- Your plugin code goes here
end
To package a plug-in, simply take the lua files where you have written your plug-in and then you are free to distribute them on github or through other means where users can download and import them.
The syntax object is in charge of all things syntax highlighting.
Use the set method to set the colour of certain tokens.
Note "tokens" refers to the different snippets of programs that should be highlighted. For example "return" is a keyword in many languages, and therefore, all keywords found in a source file will become "keyword tokens" and will all share a common colour. For example, in Rust, keyword tokens include "return", "fn", "if" etc, and it makes sense that all these should be the same colour. These all become keyword tokens.
So to set the colour of these tokens, which themselves are groups of certain snippets of text (e.g. "return"), you can do the following:
syntax:set("TOKEN NAME", COLOUR)
where TOKEN NAME becomes the name of the token and COLOUR is the corresponding colour (see the Format of Colours section above to see how to write colours into the configuration file)
So for example, if we wanted to make keywords orange, we should include the following in the configuration file:
syntax:set("keyword", {255, 165, 0})Here, the RGB value of orange is provided.
If you want a full list of the tokens that are provided to ox with explanations of what they cover, here you go:
-
stringrefers to strings in various programming languages -
commentrefers to comments in various programming languages -
digitrefers to digits in various programming languages -
keywordrefers to keywords in various programming languages -
attributerefers to attributes in various programming languages -
characterrefers to characters in various programming languages -
typerefers to types in various programming languages -
functionrefers to function names in various programming languages -
headerrefers to headers in various programming language -
macrorefers to macro names in various programming languages -
namespacerefers to namespaces in various programming languages -
structrefers to the names of structs, classes, enums in various programming languages -
operatorrefers to operators in various programming languages e.g. +, -, * etc -
booleanrefers to booleans in various programming langauges e.g. true / false -
tablerefers to tables in various programming languages -
referencerefers to references in various programming languages -
tagrefers to tags in various markup langauges e.g. HTML <p> tags -
headingrefers to headings in various markup languages e.g. # in markdown -
linkrefers to links in various markup languages e.g. URLs -
keyrefers to keys in various markup languages -
quoterefers to quotes in various markup languages e.g. > in markdown -
boldrefers to quotes in various markup languages e.g. ** in markdown -
italicrefers to quotes in various markup languages e.g. * in markdown -
blockrefers to code blocks in various markup languages e.g. ``` ``` in markdown -
listrefers to bullet lists in various markup languages e.g. lines starting with - in markdown
You can set each of these tokens individually. I recommend using the default configuration file and tweaking it from there
Ox, by default, comes with a wide variety of syntax highlighting support for various languages, but it isn't an exhaustive list and there will always be languages that aren't included by default (as there are so many of them).
If you really want to support a certain file type in syntax highlighting, then you have the power to manually add it in via the configuration file at ~/.oxrc (you will need to create this file first if you haven't already)
It is a good idea to understand what I mean when I say "token". See the Theme section above for more information on what tokens are, and what tokens are included by default in the editor.
First, it is worth going into the theory of how the syntax highlighting system in Ox works, below is a brief explanation of how it is designed.
Please note, this is quite wordy and may be quite hard to understand without an example. It might be worth jumping back and forth between the example below and the theory, just to really make sure it "clicks" for you.
- tokens - These are snippets of text that should be highlighted. For example "return" is a keyword in many languages, and therefore, all keywords found in a source file ought to become "keyword tokens" and will all share a common colour. For example, in Rust, keyword tokens include "return", "fn", "if" etc, and it makes sense that all these should be the same colour. These all become keyword tokens.
-
patterns - These are how we define what these snippets are. Ox uses regular expressions to define and identify different snippets of text. For example, if we want to make every single instance of a number a token of "digit", then the pattern we can use (in regex) is
[0-9], where all digits 0 through 9 are captured and can assigned as a "digit token". - rules - These are a group of patterns for a certain token, rules can come together to highlight a language. E.g. rules that each include their token and patterns of strings, digits, keywords etc etc to highlight a Python file.
There are also different types of tokens:
- keyword - Not to be confused with a keyword token! This is a type of token that will take a single pattern and assign all instances as a specified token. Tokens with the keyword type can not travel across multiple lines.
- bounded - This will take two patterns, one starting pattern and one ending pattern. This is ideal for multi-line tokens, such as comments or strings.
Creating keyword tokens can be done like this: syntax:keyword(NAME, PATTERN)
You can also create multiple keyword tokens like this: syntax:keywords(NAME, {PATTERN1, PATTERN2, ...})
where
-
NAMEis the name you want to assign to the token e.g.digitorcomment. -
PATTERNare the patterns that you want to attach to that token (as there is often more than one way of making a token, e.g. strings could be made up of""or'')
Creating bounded tokens can be done like this: syntax:bounded(NAME, START_PATTERN, END_PATTERN, ESCAPE)
where
-
NAMEis the name you want to assign to the token e.g.stringorcomment -
START_PATTERNis the pattern you want to start the token with e.g./*for multiline comments -
END_PATTERNis the pattern you want to end the token with e.g.*/for multiline comments -
ESCAPEis true if you want to be able to escape the end pattern, and false if not e.g."here is a quote: \" but the string continues"
To attach these tokens you've made to the syntax highlighter, you must use the syntax:new method, which uses the following syntax: syntax:new(FILE_EXTENSIONS, RULES)
where
-
FILE_EXTENSIONSis a list of file extensions that will trigger this syntax highlighting e.g.{"c", "h"}if you're writing syntax highlighting rules for C files, which have.cand.hextensions. -
RULESis a list of rules that you would have defined (using thekeywordandboundedmethods)
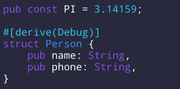
Now it's time to bring it all together with an example, where we write very basic syntax highlighting for a python file:
syntax:new(
    -- File extensions of python files can be .py or .pyw
    {"py", "pyw"},
    -- Now let's define some rules
    {
        -- Adding in tokens of type keyword to highlight keywords in the language
        syntax:keywords("keyword", {"def", "return", "print", "if", "else", "elif", "import"}),
        -- Adding in a token of type keyword to highlight digits in the language
        syntax:keyword("digit", "[0-9]+"),
        -- Adding in a bounded token for strings
        -- We allow escaping strings by passing true in
        -- (e.g. "a quote is \" not going to end the string")
        -- Using a bounded token allows strings to be on multiple lines
        syntax:bounded("string", "\"", "\"", true),
    }
)
This is a small example that is far from complete, but hopefully, it gives you an idea of how to write syntax highlighting rules for your own files.